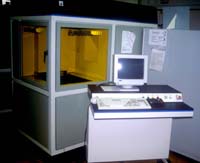
We introduce here one of the first RP techniques that delivers excellent results in terms of resolution and material properties, Stereolithography.
Stereolithography (SL) was available as early as in 1986 (3D systems) and used in operation planning since the early 1990s. Translucent or opaque materials can be employed depending on the application, for instance if internal features should be visible or if painting for a more realistic look is eventually desired.
The steps to a stereolithographic model
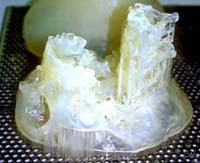
 1. 3D volume data is first converted into surface data, mostly into the popular STL-format which has its origin in Rapid Prototyping. Before the actual building, the data has to be adapted for production which includes compensating for shrinking, generate layers and implement support constructions if necessary.
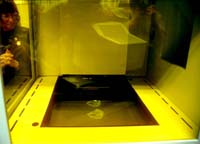 2. Moving into the apparatus itself, we find basically a basin containing a liquid photosensitive resin and a pivoting UV laser. Each single layer of the model to be built is converted into signals that control the laser device.
 3. The UV laser "draws" the shape of the layer onto the surface of the resin, thus hardening the liquid resin.
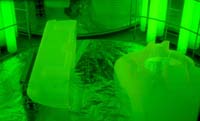
 4. Subsequently, the platform is lowered for a small step (typically 0.1 mm) to dip the hardened part. More liquid resin is then covering the surface and a new step of layer building is started. This process of dipping and laser hardening continues until the entire model is built.